In this article
For a compact vehicle, measure the seating position, the space needed by the front occupant, buckle and anchor access, and the child's current stage before choosing a Nuna car seat. Published product dimensions can narrow a shortlist, but they cannot predict installed fit. Installed fit also depends on the exact vehicle seating position, the restraint's required recline, and usable space for adjacent passengers.
A good fit plan produces measurements and stop rules, not a promise that a particular seat “fits all compact cars.” Use this worksheet before an in-vehicle trial with the exact Canadian seat and manuals.
Step 1: define the seating job
Write one sentence that describes the setup you actually need. For example:
- rear-facing infant seat behind the front passenger, with one adult beside it;
- rear-facing convertible behind the driver, with the driver at their normal position;
- forward-facing harness in the centre, with access to the top tether;
- high-back booster beside another child seat, with independent buckle access.
Mode matters. The same convertible can occupy a different envelope rear-facing and forward-facing. A booster requires correct buckling, lap-and-shoulder-belt routing, and fit for the child in the actual vehicle.
Step 2: record the vehicle envelope
Begin with a seating position permitted by the vehicle manual and install under both the restraint and vehicle instructions. Do not move the front seat into an unusable position to create an optimistic measurement.
| Measurement | Where to measure | Why it matters |
|---|---|---|
| Seat-cushion usable width | Across the intended rear seating position, noting raised bolsters and buckle stalks | A flat web measurement can hide contours that tilt or crowd the restraint. |
| Seat-bight to front-seat space | From the junction of rear cushion and seatback toward the front seat at the expected restraint height | Rear-facing recline and shell shape consume space above the cushion. |
| Door-opening clearance | Narrowest path through which the carrier, child or caregiver must pass | A seat may install successfully but make daily loading difficult. |
| Buckle and anchor locations | Mark lower anchors, buckle stalks, belt origin and top-tether anchor from the vehicle manual | Hardware location controls approved installation and booster access. |
| Head-support height | Vehicle seatback or head restraint in the intended booster position | No-back booster use depends on adequate vehicle support and the booster manual. |
Keep these as planning measurements. Use published measurements only to shortlist seats; install the exact model under the restraint and vehicle manuals. The child-seat and vehicle manuals define allowed contact, overhang, seating positions and anchor use.
Step 3: use Nuna dimensions only as a shortlist filter
| Current Canadian model | Published dimensions | Important limitation of the number |
|---|---|---|
| PIPA urbn | 17.5 in. W × 25 in. L × 22 in. H | External dimensions do not show the installed vehicle-belt or rigid-UAS geometry or the manual's required recline. |
| RAVA | 19 in. W × 27.25 in. D × 27 in. H | Installed front-to-back space varies by mode, recline and vehicle-seat contour. |
| ROYL | 22.5 in. L × 18.5 in. W × 26–33 in. H | Booster access and harness-mode installation need separate checks. |
| AACE | 11.8 in. W × 14 in. D × 22.4 in. H | The product expands and adjusts; a single listed dimension is not an installed maximum envelope. |
Published exterior dimensions do not describe every installed configuration. Do not infer a three-across fit by subtracting one published seat width from the bench width; confirm every exact restraint in every intended position under the restraint and vehicle manuals. The widest contact points may occur at different heights, and each seat needs independent access and an approved installation.
Step 4: test front-to-back fit without sacrificing the front occupant
Install the exact model and mode according to its Canadian manual, then return the front seat to the regular occupant's safe position.
Check:
- whether the child restraint may touch the front seat according to both manuals;
- whether the front occupant retains a permitted seat position and contact, correct belt routing and unobstructed vehicle controls;
- whether the driver can operate the steering wheel and pedals normally;
- whether the restraint has the required recline and an allowed amount of overhang;
- whether the carrier can be attached and removed without changing the installation.
Stop rule: the setup fails for prohibited contact, loss of required clearance, compromised belt routing or control access, or any position outside the vehicle and child-seat manuals. Record inconvenience separately as a buyer-use issue.
Step 5: test side-by-side independence
For two or three occupants across a rear bench, each restraint must work independently. Install one seat correctly, then install the neighbour. For a booster, if correct installation under the booster and vehicle manuals remains unclear, a child car-seat clinic may be able to help verify the installation.
For a booster, verify that the child can buckle correctly and that the lap-and-shoulder belt is routed through the proper guides without obstruction. Then check that the shoulder belt retracts freely after the child leans forward and returns. A narrow numerical width does not solve a buried buckle.
Stop rule: if an adjacent seat blocks the correct belt path, connector release, buckle, recline indicator or required clearance, choose another seating arrangement.
Step 6: include the loading path
A technically successful installation can still be a poor daily fit. Rehearse loading with the vehicle parked:
- open the door to the width available in a typical parking space;
- use an unoccupied exact-seat installation trial; assess child fit with the actual child only when appropriate and permitted;
- buckle without twisting straps or leaning on another restraint;
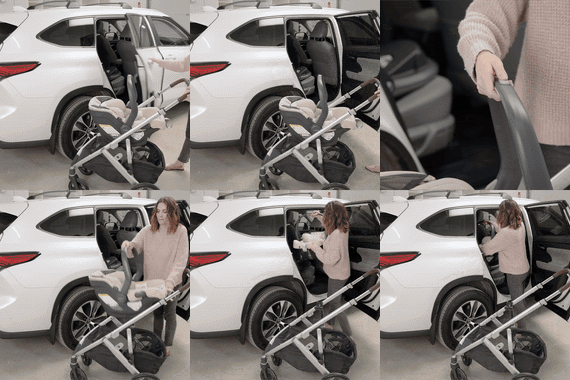
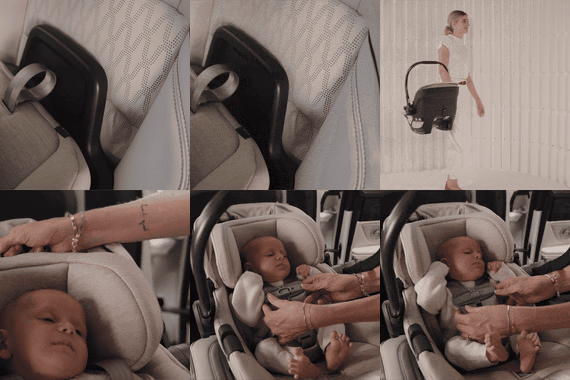
- for an infant carrier, attach and release it several times;
- for a booster, have the child locate and use the buckle;
- confirm every regular caregiver can repeat the checks.
Door clearance, roof height and caregiver reach can make two equally safe installations feel very different. These are legitimate buying criteria once every safety requirement is met.
Compact-vehicle fit sheet
Use a controlled retailer trial
Ask whether the retailer permits a supervised in-vehicle trial and what identification or assistance is required. Bring the child when a fit assessment is appropriate, both vehicle and child-seat manuals, and every regular front-seat occupant whose position affects the installation. Do not rely on a demonstration seat with a different model number or missing inserts.
Test one variable at a time. Begin with the intended seating position and approved installation method. Record recline, front-seat position and buckle access. Then test the alternative permitted position, if needed. Photos can help the household remember which setup was tested, but the manuals remain the instructions and the seat must be checked again after purchase.
Compare rejected setups, too
Write down why a setup failed: front occupant position, prohibited contact, blocked buckle, inaccessible tether, unstable independent installation or difficult loading. A precise rejection prevents the same unsuitable arrangement from returning later because someone remembers only that the seat “almost fit.”
When comparing another brand or model, repeat the same measurement and trial protocol. Do not lower the pass condition to favour a preferred product. The useful winner is the seat that fits the child, vehicle and caregivers while satisfying its Canadian manual, regardless of logo.
| Item | Measured or verified result | Pass condition |
|---|---|---|
| Child's current stage and measurements | _____ | Within every Canadian manual rule |
| Intended vehicle position | _____ | Permitted by vehicle and child-seat manuals |
| Approved installation method | _____ | Correct for mode and child weight |
| Front occupant's vehicle-manual-permitted position | _____ | Belt routing, control access, contact and required clearances all pass |
| Independent installation beside other seats | _____ | Each remains correct when checked separately |
| Buckle, belt and anchor access | _____ | Unblocked and correctly routed |
| Daily loading path | _____ | Repeatable by every regular caregiver |
Installed fit beats catalogue width
Measure first, then verify in person.
Repeat the trial when the seat changes direction or mode, when another restraint is added beside it, or when the vehicle changes. A setup that passed for an infant carrier does not establish fit for a rear-facing convertible, and a harnessed setup does not establish later booster buckle access.
Use published dimensions to decide which Canadian Nuna seats are worth bringing to the vehicle, not to decide which one fits. A compact-car result depends on the exact mode, recline, seating position, front occupant, adjacent restraints and belt geometry. Start with the relevant model in the Nuna collection at baby enRoute, then complete an approved in-vehicle trial before purchase. A measured “no” is more useful than an untested promise.